The Lesson Structure tab manages the content of a learning product. This includes uploading/creating content, defining completion requirements, controlling the order in which content appears, and controlling the order in which content must be completed (gating). The structure is broken into lessons, which contain blocks, which contain activities.
Follow these steps to build and change any default Lesson Structure, which will contain one Lesson Block and one Activity Block.
- Use the
 Dropdown button to expand and collapse Lesson and Content Blocks.
- Click on any Red, or Blue underlined text to change or add Descriptions, Names, or Titles.
- Click the
 ,
,  , and
, and  buttons to add content to your Lesson.
- Check the
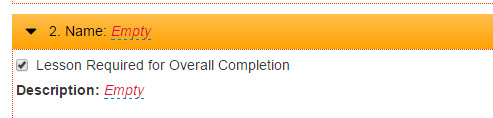
 box if learners must complete a Lesson or Block for "Overall Completion."
- Click the appropriate radio button in a Lesson to lock or unlock Gated Access. If locking Gated Access, enter the Name of the Lesson that must be completed to unlock access.
- Drag-and-drop individual Blocks into the order they should be presented to Learners. Click and hold your mouse key to drag an Activity Block or Credit Block into place.
- Drag a Block into a “Child” position so learners must complete it after its “Parent” Activity is complete.
- Activities in “Sibling” position can be accessed at the same point in the Lesson, in any order.
Any type of content included in your learning product will be delivered as an activity—whether it is an assessment, a SCORM content package built in an authoring tool, a survey, a live classroom event, etc. Activities are the basic building blocks of a learning product.
You have the option to add 15 different types of activities when building your learning products.Click the links below for information about each activity type.
- Assessment
- Attestation
- Classroom
- Content HTML
- Content Package
- Discussion
- Drop Box
- Evaluation
- External URL
- LTI Launch
- Pause Point
- Self-Check
- Sign-off
- Video
- Webinar
How to Add an Activity
- Click the button in the appropriate Activity Block.
- Select the activity and complete the configuration options for the activity.
- Click the Edit link to make changes to your activity configuration.
- You can move activities around within a block or to other blocks or lessons by hovering over the
 button, clicking and dragging and dropping the activity in the desired location.
- Click the
 icon to delete an activity.
Activity Blocks
Activities are added to your learning product using Activity Blocks. These blocks let you determine how your learners will flow through the activities in the course. You can designate which activity must be completed first, second and so on, and which ones are required for completion.
Adding and Using Blocks
New Learning Products start out with one Lesson and one Block.
- In the appropriate Lesson, click the button and select Activity Block.
- To add an Activity to your Block, click the Add Activity button and select the appropriate activity type.
- You can add any number of activities to a block. If there are multiple activities in a block, they will all be accessible to the learner at the same time. This means that your learners do not have to complete the activities in order.
- You can move blocks to different locations by dragging and dropping. Hover over the gray bar at the top of the block, click and drag and drop the block in its new location.
-
Click the
 to collapse a block and its child blocks in the admin view. Note that this does not affect the learner's view of the content. Click again to expand.
 -
Click the
icon to delete a block. Note that deleting a parent block will delete all of its children blocks as well.Completion Requirements
Gating
- Blocks are used to create the structure of your Learning Procuct. They control the order in which activities can be accessed by your learners. This is referred to as Gating.
- Activities inside "Parent Blocks" will be accessible to your learners first. To add activties that can only be accessed after completing the activities in the parent block, create a "Child Block".
- After adding a new block, hover over the gray bar at the top of the block, click and drag and drop the block under the parent block. Notice that a red box appears, letting you know where to drop the block in relation to the other blocks. When the red box in your desired location fills in, drop the block in place.
- If you add a child block to a child block, you will create a structure that requires completion of activities in order. You can add as many child blocks as necessary to control the flow of activities.
- You can create "Sibling Blocks" by adding a block to the same level as another block. This will let your learners access the activities in both blocks at the same time.
- You can move your blocks around to any location and make changes to the structure as you build. Note that when you move a parent block, all of its children blocks move with it.
- Activities inside "Parent Blocks" will be accessible to your learners first. To add activties that can only be accessed after completing the activities in the parent block, create a "Child Block".
Tips for designing the layout of your lesson:
- Blocks are used to control the order in which Activities are accessed by learners.
- Blocks can be a “parent,” “child,” or “sibling” to another Block.
- An Activity must be contained within a Block.
- A Block may contain as many Activities as you like. To create more structure in the learning product, separate Activities into different Blocks by the order in which they should be accessed and completed.
Credit Blocks
Credit blocks let you add Credit Profiles to the Learning Product structure so that learners can claim credit after completing certain requirements. Credit blocks are added in the same way as activity blocks. You can drag and drop the credit block anywhere so that it is gated by the activities that are required to achieve credit. You can add multiple credit profiles inside the block and your learning product can include as many credit blocks as needed to facilitate the credit and requirements.
- In the appropriate Lesson, click the button and select Credit Block.
- To add a Credit to your block, click the
 button.
- Use the Credit Profile Picker to select an Activity by name, or click
 to select a New Credit Profile:
- Fill all required Credit fields in Credit Information, Integration Information, and Statement of Credit on the “Standard Credit Profile.”
- more about Credit Profiles
 to finish adding yourCredit Profile.
- You can move credit blocks to different locations by dragging and dropping. Hover over the gray bar at the top of the block, click and drag and drop the block in its new location.
-
Click the
to collapse a block and its child blocks in the admin view. Note that this does not affect the learner's view of the content. Click again to expand. -
Click the
icon to delete a block. Note that deleting a parent block will delete all of its children blocks as well.
All of your activities and credits are encompassed by a larger framework called Lessons. Each learning product starts out with one lesson.
Multiple lessons are useful when you have a large course with many activities that are broken into modules, course topics or semesters. Smaller learning products with just a few activities may only need one lesson.
A lesson contains a block or blocks of activities. Lessons can be used to control the order in which blocks of activities are accessed, as well as control the credit profiles applied to blocks of activities. Gated access can be used to lock a lesson until other specified lessons have been completed, or all lessons can be available immediately. In the learner view, lessons can be collapsed for a broad view of the learning product, and then opened to view each block of activities. Lessons can include resources, a description and a title.
- Click the
 button at the top right of the page to add a new Lesson.
- The new lesson will appear under the existing lessons.
- To move the lesson to a new location, hover over the orange bar, click and drag and drop the lesson in place.
- To name the lesson, click on the Empty link in the orange bar, enter the name and click the
 button to save. To remove the name, click on it, delete the text and save.
- T add a description to the lesson, click on the Empty link next to the Description header, enter the text and click the to save.
- To delete a lesson, click the icon inside the orange bar.
- If you are deleting a lesson that gates another lesson, be sure to remove the gating first.
Tips for designing the layout of your lesson:
- Blocks are used to control the order in which Activities are accessed by learners.
- Blocks can be a “parent,” “child,” or “sibling” to another Block.
- An Activity or Credit Profile must be contained within a Block.
- A Block may contain as many Activities or Credit Profiles as you like. To create more structure in the learning product, separate Activities into different Blocks by the order in which they should be accessed and completed.
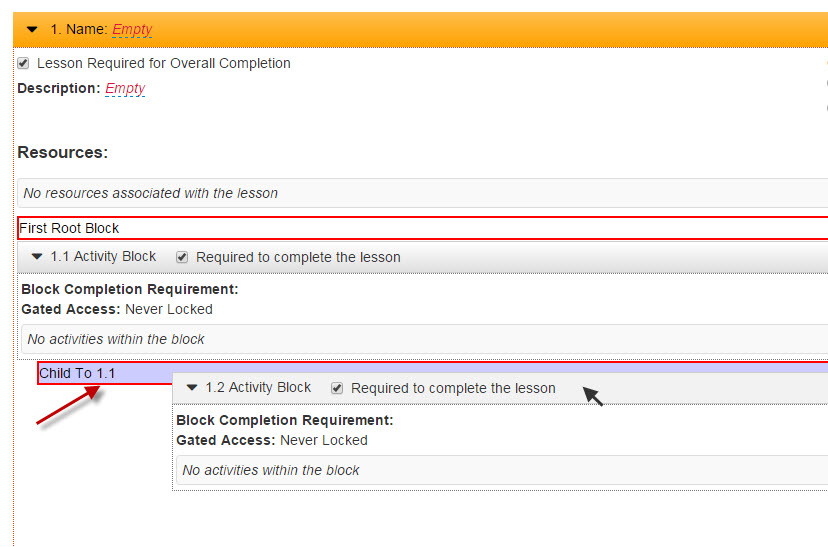
An outline numbering system is shown on the lessons and blocks. The labeling is used to help show which items are blocked by, or dependent on, other lessons or blocks. The outline labeling is just an aid when designing the learning product flow and is not shown to learners.
For example, notice that the blocks below are in Lesson 1, and the first block is labeled as 1.1, the next block is 1.2 and so on. The first block in Lesson 2 is 2.1.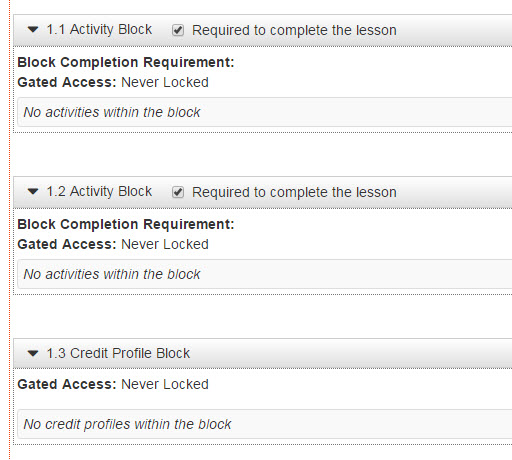
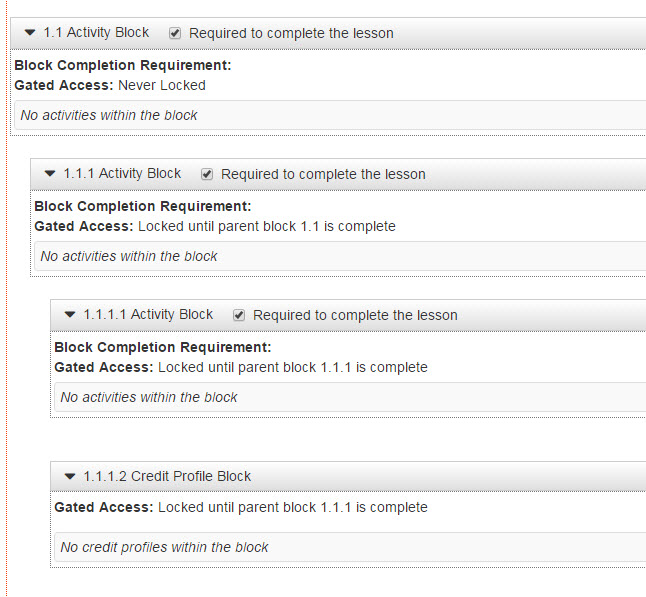
Child blocks continue the numbering of the parent block—the child block below is 1.1.1, the next child block is 1.1.1.1.
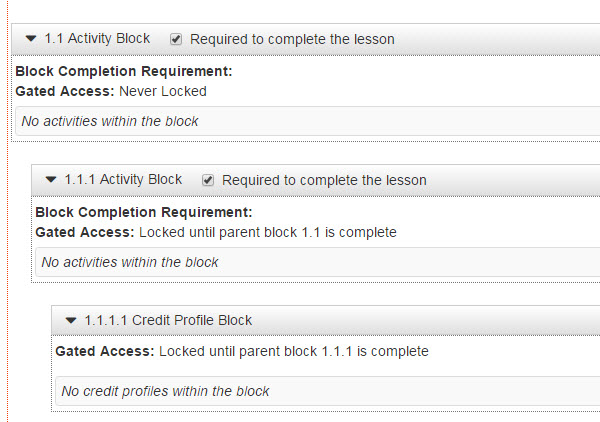
The bottom block below is a sibling block to the one above it, so it is labeled as 1.1.1.2.
Lessons can be used to gate your activity and credit blocks.
- Under Gated Access, select Never Locked to let your learners access the lesson and its activities at any time.
- Select Locked Until the Following Lessons are Completed to choose other lessons that must be completed before this lesson can be started.
- Click on Empty and click in the field to see the other lesson numbers that are available.
You can select one or more lessons and then click the blue checkmark to save. - To change the gating, click on the lesson numbers that you chose and click the X to remove them.
- Click on Empty and click in the field to see the other lesson numbers that are available.
If you want to create a gating structure for your activities where they must be completed in a specific order, you'll need to add more blocks. In Learner Community, we refer to blocks as "parent, sibling and child blocks". A parent block must be completed before any of its children blocks can be started. Sibling blocks can be accessed at the same time.
- To make a block a child to another block, hover over the gray bar at the top of the block, click and drag the block under the parent block. Notice that a red box appears, letting you know where to drop the block in relation to the other blocks.
- When the red box in your desired location fills in, drop the block in place. You can move your blocks around to any location and make changes to the structure as you build.
Note that when you move a parent block, all of its children blocks move with it.
There are many ways that you can set completion requirements in your learning product. You will need to think about the learner experience and the requirements for how they get credit or a completion, and how they should be able to move forward in the course.
- When a lesson is required for overall completion, all of the completion requirements within that lesson must be completed to mark the lesson complete. If you uncheck the Lesson Required for Overall Completion box, the overall learning product can still be completed even if some of the required blocks or activities in the lesson aren't complete.
- You should have at least one lesson required so that the learning product will not show an automatic completion upon enrollment.
- Inside the lessons you can set completion requirements for each block.
- You can choose to make the block required for completion of the lesson.

- You can require the learner to complete all of the activities in the block, only a certain number of them, or none of them to achieve a completion of the block.

- If the block is required to complete the lesson but all of the activities in it are optional, its child blocks will be accessible without completing the parent block.
- You can choose to make the block required for completion of the lesson.
If a learner fails a required activity within a block, that block will not mark complete. If the block is required to complete the lesson, that lesson will also not mark complete. If the lesson is required for completion of the overall product, that product cannot be completed and will be marked as failed.
Resources can be added to a lesson as supplemental content. These will not be included in the course flow or as completion requirements and will display at the top of each lesson. Resources can be links or files such as PDFs or slide decks.
- Click and choose the URL, File, or LTI option.
- Enter the URL or upload the file.
- For LTI resources, select an existing LTI resource or create a new one.
- To create a new one, set a title, select the LTI Provider, enter the Launch URL and any Custom Parameters.
- LTI resources will open in a new window/tab.
- The Name that you set for the resource will be displayed to your learners
All file types are accepted except .exe or .bat. The file size limit is 2G.
The ![]() button lets your review your learning product from the end-user perspective.
button lets your review your learning product from the end-user perspective.
As an administrator, it is important to be able to review your learning products as you assemble them and before publishing live. You have two options when reviewing on staging:
- Normal Enrollment lets you see the learning product just as your learners will, with all gating and completion requirements intact.
- Ungated Review lets you access all activities without any gating or requirements. You are able to launch every activity without needing to complete anything first.
When reviewing an enrollment, you have some Administrative Options on Staging to assist with your review.
- Click the
 button to completely remove your enrollment in the learning product.
- Click the
 button to refresh your enrollment and remove any progress or completions.

Learning Product Options:
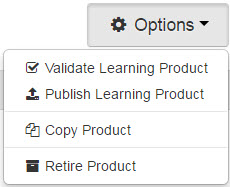
- Validate Learning Product: To check your learning product to be sure it is ready to publish, choose the Validate Learning Product Option from the drop down list. You will see a list of Errorsand/or Warnings letting you know about any issues that will prevent your learning product from being published, or possible missing elements that you may want to include in your learning product.
- Warnings are only meant to inform you of items that you may want to include, but that are not required.
- Publish Learning Product: The Publish Learning Product option lets you publish your learning product to your live portal. You can also publish products on the Learning Products Dashboard.
*Note: It is important that you review the product to ensure that it is ready for use by the public. Other than to correct spelling errors, republishing should be avoided. ALWAYS validate your learning product before publishing.
Structure: If your structure has changed, Enrollments and Completions will be maintained but all enrollment progress may be lost. If evaluation or assessment questions and/or choices have been changed, this will affect reporting on those items if Learners have already submitted responses.
Completion Criteria: If the completion criteria changed it will not affect existing completions. However, changes could cause new completions to be recorded automatically.
Credit Profile: If a Credit Profile has been set to expire, Learners will no longer be able to claim the credit after the expiration date of the credit profile. New credit profiles may become eligible for Learners that have already met the credit profile criteria.
- Copy Product: To make an exact replica of the learning product, choose the Copy Product option from the drop down list. This will create a brand new product with identical settings to the current product, including configuration, activities and settings, structure, certificate, etc. Integration Product and Completion codes will not copy. You can modify the copy as necessary.
- Retire Product: If the learning product is no longer valid or needs to be removed, choose the Retire Product option from the drop down list. Retiring a learning product will remove all existing enrollments on both staging and LIVE, and will prevent any new enrollments from occurring. Retired products will still be available for reporting on staging and LIVE.
- At this time, it is not possible for you to "un-retire" a learning product. This will need to be sent as a request to our IS department.
- When a learning product is retired, it will NOT be visible in the following locations:
- New Bundle (assignments area)
- Manage Single Enrollment Code (New/Edit)
- Add Learning Product
- Manage Enrollment Codes (New/Edit)
- Add Learning Product
- Subsidiary Enrollment Code
- Add Learning Product
- Manage Learning Product
- Not Published
- Published
- Badge Add Rule
- Edit badge (3rd option on add role)
- Subsidiary Portals
- Add Learning Product
- New Enrollment Code Bundle
- Marketplace > Licensed Products (like Deleted UTC)
- All tabs, all grids
- Export Clients
- New Export
- Subscriptions
- Add Learning Products (selection grid)
- Certifications > (display "Retired Product", like deleted)
- Add Learning Products
- Assignments
- Add Learning Product
- When a learning product is retired, it will be visible in the following locations ("retired" will be noted next the product title):
- Reports
- Enrollment Detail - Not displaying retired products
- Enrollment Progress Summary - Section Picker
- Enrollment Summary
- Assessment Summary
- Assignments > Assignment Detail > Assignment option > not displaying assignment with retired LP
- Manage Single Enrollment Code (New/Edit)
- Selected Learning Product
- Manage Enrollment Codes (New/Edit)
- Selected Learning Product
- Manage Learning Product
- Retired
- All
- Subscriptions
- Selected Learning Product
- Export Clients
- Edit Products
- Subsidiary Portals
- Selected Learning Products
- Selected Enrollment Code Bundles
- Certifications > (display "Retired Product", like deleted)
- Learning Products Grid
- Learner > Manage Learner
- Enrollments (display "Retired Product" label)
- Marketplace
- Licensed Products > Your Products Licensed to Organizations grid
- Sections - Admins still need to be able to manage sections for retired products
- Assignments
- Selected Products
- Reports