The Webinar learning activity lets you use the Section Dashboard to schedule a live webinar, using one of the Webinar Providers configured at Products > Webinar Providers. The learner can launch the webinar directly from the learning product and track completion.
Learners can get a completion for the activity either by launching and viewing it during the scheduled webinar time, or by redeeming an attendance code that is generated by the section administrator while scheduling. This lets learners view the webinar in a meeting or classroom setting but still complete the activity in the learning product.
Webinar activities are defined on staging in the learning product's structure, and then are scheduled on live in the Section Admin area. You schedule a separate webinar in each section of the learning product. Learners will be able to launch the webinar for only the section in which they are enrolled.
Note: The Webinar activity does not include a feature for adding a recording of the webinar after it has ended. However, as a suggestion, you can add a Video activity to your learning product and upload the webinar recording as a separate activity.
- Enter the Title of your Webinar learning activity. This is the activity title that the learner will see when they launch the activity.
- Select the Webinar Provider from the dropdown menu, which lists the Webinar Providers that you/one of your portal administrators has configured in your Knowledge Connection portal.
- Optionally enter a Short Description about the webinar. This will be visible to the learner.
- Click
 .
.
Reminder: This is a placeholder learning activity. After the Learning Product has been published, an administrator needs to schedule the webinar within each Section on your live site.
Webinars are scheduled and launched from the Section Dashboard.
If the product includes one or more Webinar learning activities, the "Webinars" table will be visible on the Section Dashboard.
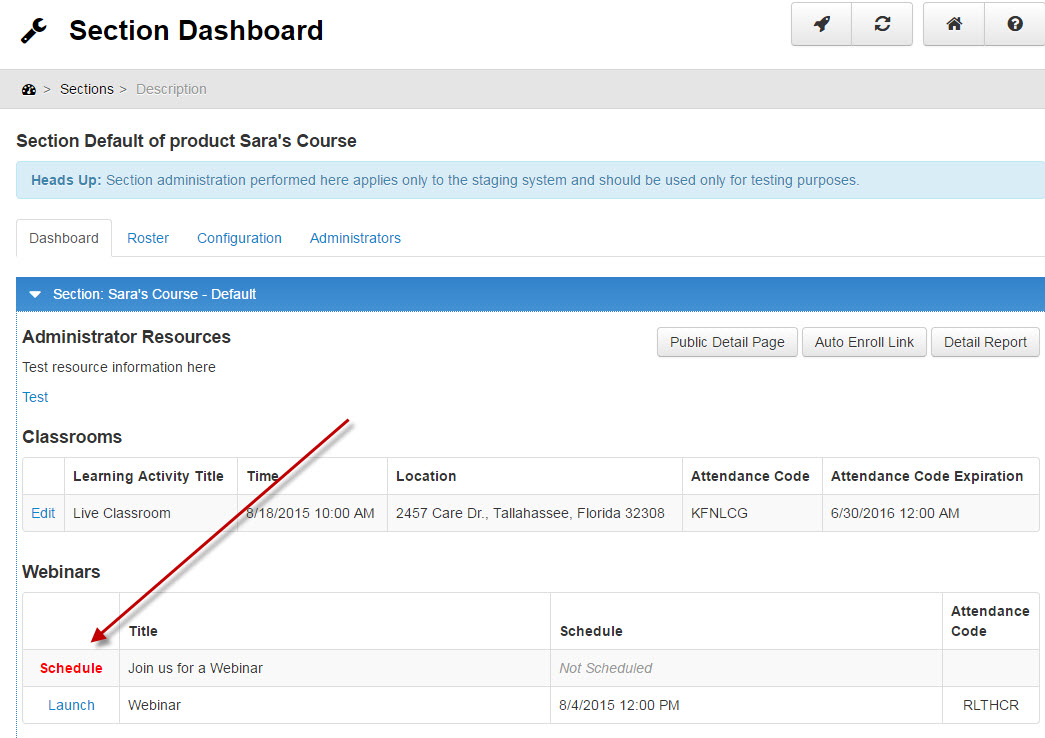
- Click Schedule to schedule the webinar. Be sure to pick a date and time that doesn't conflict or overlap with any other webinar scheduled with the same provider (whether via a learning activity or outside of Knowledge Connection).
- The product Lesson, Activity, and Timezone will be displayed.
- Enter the webinar Start Date by clicking the
 button and Start Time by clicking the
  button (or just type the date and time).
- Enter the webinar End Time by clicking the button (or just type the time).
- An Attendance Code will be generated automatically, but you can change it to any code you wish to use as long as it is unique (if the code is already being used, you will not be able to save).
- If you want learners to be able to complete the Webinar activity without launching it directly from within the learning product at the scheduled time, you can give out this attendance code during the webinar. The code can be redeemed at any time by the learner from within the activity.
- Click to schedule the webinar, or
 to remove the webinar date and time.
- The date and time and attendance code will be displayed on the Section Dashboard.
- At the webinar start date and time, click the Launch button to start the webinar. The learners who are enrolled in the section will be able to launch the activity and view the webinar until the admin ends the meeting.
- To edit your webinar date/time/code, click the Edit button next to the Activity Title in the Customizable Content table on the Section Dashboard.
If you use a webinar provider that Knowledge Connection doesn't support directly, you could still provide a link to any externally scheduled webinar by using a Content HTML learning activity. You won't be able to schedule or track the webinar from Knowledge Connection, but this will let your learners launch the webinar directly from the learning product.
To do this, add a Content HTML learning activity to your learning product, and enter a useful Title and Short Description.
If there will be only one Section/one webinar that all learners attend, then leave Customizable By Section set to "Cannot be customized" and in the HTML area provide the details for the webinar's scheduled date/time/timezone, and add the link that launches the webinar.
If there will be multiple Sections that will each have a separate webinar, then set Customizable By Section to "Must be customized" so each Section Admin must customize the HTML to provide their specific section's scheduled date/time/timezone, and the link that launches their specific webinar.
Whoever enters the webinar details can also enter any other information that learners need to know.