What are Groups?
Groups apply only to organizations that use native (not integrated) login and manually maintain a group hierarchy for their learners. The "Manage Groups" options lets you organize and edit new groups within your hierarchy.
Group hierarchy examples: Region > District > Store or State > County > City
Manage Groups
Table shows group lables in heirarchy order, delete groups, learner/vendor exclusions, search for group
- Click the
 button on the Manage Groups dashboard.
- Enter a Unique Code for your Group. The Unique Code must be limited to 32 characters.
- Enter a Name for your Group. The Name must be limited to 50 characters.
- Select whether to authorize and enable Exclusion Checks for your Group.
To make changes to an existing group, click the  next to the Group Name in the grid.
next to the Group Name in the grid.- The Manage Groups page has a Show "Not Active"? toggle button to the right of the Group Search feature. Toggle to Yes to show groups that have been de-activated.

- With the toggle enabled, the Not Active Groups will be identifiable by a grey Not Active tag located next to the Group Name.

- To Re-activate the group, click on the Power button located to the right of the Group Name and Not Active tag.

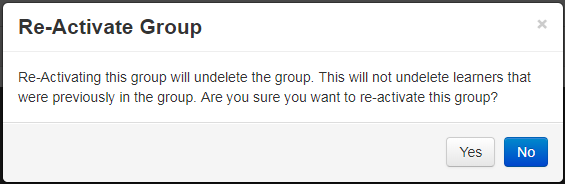
- You will be asked to confirm the re-activation of the Group.
Note: Clicking Yes will Re-activate the group, but will not re-activate the learners that were previously associated with that Group.